Building a CLI wordle game in Rust: Part 5
Welcome to the fifth part of this Rust tutorial. In Part 4, we coded an import tool to extend the localized text-file based dictionary and added an integration test. We learned how to parse command line arguments and print meaningful errors for them. This time we will connect a database and implement additional features.
Table of Contents
- Prerequisites
- Getting started
- About ORM
- Sqlite setup
- Postgres setup (optional)
- Adding a new dictionary
- Fun with diesel ORM
- Fun with diesel’s query builder
- The fuzz about
dynandBox<?> - Switching dictionaries
- Rolling back
- Wrapping it up
Prerequisites
This part continues from the last as always, so make sure you completed Building a CLI wordle game in Rust: Part 4. For the database integration, there are a few things to be done before we start. Install the CLI for diesel, an ORM and query builder by following the “Installing Diesel CLI” step on the getting started page.

If you have troubles finding the install section, use the following command.
cargo install diesel_cli --no-default-features --features sqlite
Sometimes, there are things missing for diesel to work. In my case, a lib for the sqlite3 development integration was missing because it’s not part of the artifact.
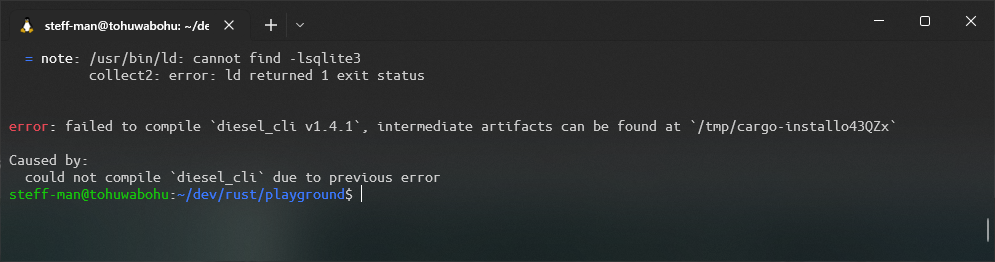
Try sudo apt install libsqlite3-dev when encountering this error.
I originally started this part with postgres, but changed my mind halfway through this tutorial. Don’t get me wrong, postgres is a great, well-maintained, feature-rich DBMS, but it does have too many features we don’t need in our application. For example, we don’t need administration, multiple users, concurrency or complex data types. You’d have to perform some additional setup by installing a local postgres instance or setting up a docker container.
A sqlite database would suit our needs perfectly, it does not require you to perform any additional setup, and it can be shared in the git repository (albeit binaries shouldn’t be put in git). It can be shipped as part of the finished application.
However, if you want to use postgres instead, feel free to do so. Because I
already prepared this chapter,
jump to the postgres setup and just mentally replace
any mentions of sqlite with postgres thorough the source code and Cargo.toml
explanations. Because we use an ORM, there shouldn’t be any differences.
Use diesel --version to verify if your installation is working. In this
tutorial I use version 1.4.1.
After that, there are four new Rust community crates to be used, add them to
your Cargo.toml like this:
[package]
name = "fancy-hangman"
version = "0.1.0"
edition = "2021"
default-run = "game"

[[bin]]
name = "game"
path = "src/main.rs"


[[bin]]
name = "import"
path = "src/bin/import.rs"

[dependencies]
colored = "2"
rand = "0.8.5"
any_ascii = "0.3.1"
sys-locale = "0.2.0"
uuid = { version = "1.1.1", features = ["v4", "fast-rng"] }
clap = { version = "3.1.18", features = ["derive"] }
strum_macros = "0.24.0"
dotenv = "0.15.0"
chrono = "0.4.0"
diesel = { version = "1.4.4", features = ["sqlite", "chrono"] }
As mentioned before, diesel is the tool of
choice for database integration. We will have a Date column in the
dictionary table, so we need chrono because
it’s required by diesel. Thanks to dotenv we
can read environment variables from a local .env file.
Run cargo build.
Getting started
Over the next few minutes we will
- Set up a database
- Implement a new dictionary
- Implement the “word of the day” feature
About ORM
I’m not the biggest fan of query builders and object relational mapping. You tend to forget what is happening under the hood. Usually, you spend a lot of time figuring out how to correctly build a working query in a particular framework and sometimes DBMS features are not supported. All that precious time could be spent on actually learning SQL instead.
On top of that, when it comes to complex data queries, e.g. by joining tables, you often need to fragment statements that could be a more performant single one, only to manually merge the data in the code later. When a generated query fails – not only faulty statements, but also those that return unexpected data – it can be hard to analyze what actually has been executed on the DBMS, depending on the framework.
But to be fair, with smaller data structures like we have with our Dictionary
those frameworks do provide some convenience. And because this is a Rust
tutorial and not a SQL tutorial I’ll hold myself back and disregard the
performance aspect albeit there might be prettier table designs.
Sqlite setup
Download and install the latest sqlite
binaries suited for your system. When using Linux or
Ubuntu WSL, you should be able to install sqlite by
issuing sudo apt install sqlite3 in the terminal. Verify the installation by
executing sqlite3 in the terminal.
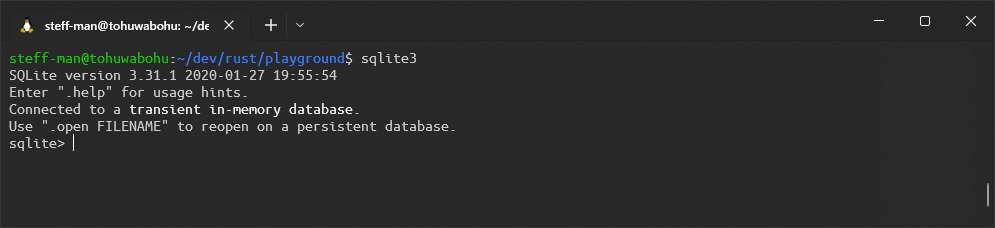
Close the application by pressing ctrl+d.
The database will be represented by a single file named dictionary.db located
in the res/db directory. Create a .env file in the project root and set the
DATABASE_URL property accordingly.
DATABASE_URL=res/db/dictionary.db
Run diesel setup. This command creates a migrations folder and a
diesel.toml in the project root.

That’s it! You can jump to the chapter Adding a new dictionary now.
Postgres setup (optional)
As DBMS, you can optionally replace sqlite with postgres. Install the packages for diesel needed as described in the page.
I will use docker when explaining the database setup. You can choose between configuring a local postgres instance or setting up docker if you didn’t have already. By now, you should have set up a working diesel CLI installation as I mentioned in the prerequisites. Time to set up the database itself. We’ll use the latest postgres Docker image by executing the following command.
docker run --name wordle-db -e POSTGRES_USER=wordle-rs -e POSTGRES_PASSWORD=wordle-pwd -p 5432:5432 -e POSTGRES_DB=wordle-db -d postgres
In the documentation it said that theoretically you can set it up without a
POSTGRES_PASSWORD set, but when I tried, the container would not start up so
make sure you set it. Check your container with docker ps.

One tip: After the first successful container start, you can shut it down with
docker stop wordle-db and start it again with docker start wordle-db. You
will receive an error when running the full command twice.
After it’s up and running, create a .env file in the project’s root directory.
Set the DATABASE_URL property required by diesel to point to the database we
just created.
DATABASE_URL=postgres://wordle-rs:wordle-pwd@localhost:5432/wordle-db
Run diesel setup. Let’s look into the database container once it has finished
by issuing docker exec -it wordle-db psql -U wordle-rs -d wordle-db.
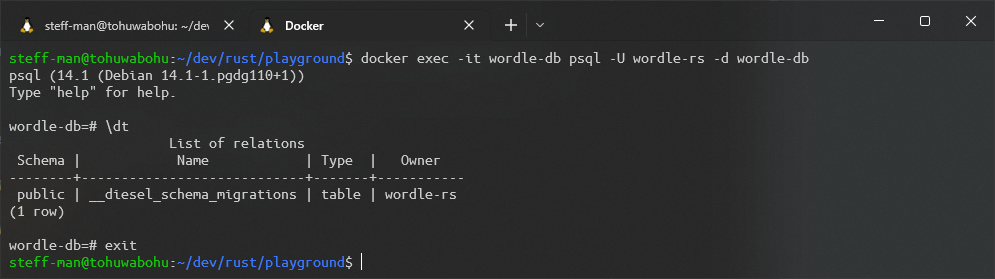
Adding a new dictionary
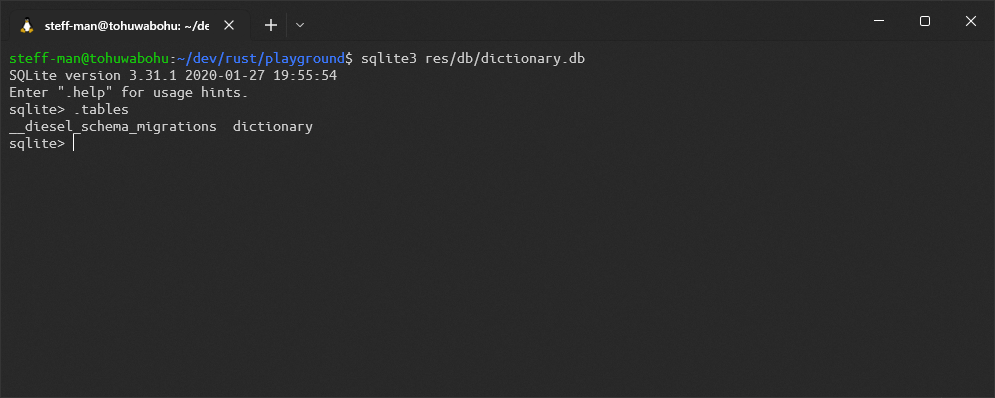
You can ignore the __diesel_schema_migrations table. It just helps diesel
internally to handle stuff and is unrelated to our own data. Speaking of which,
time to create the dictionary table. In order to do so, define a
diesel migration with the
following command.
diesel migration generate create_dictionary
This will generate a new folder containing the migration’s name in the
migrations directory in the project root.

Anything in those generated files will be executed when telling diesel to
migrate. up.sql should contain the table creation SQL.
create table dictionary
(
    id      integer primary key not null,
    word    varchar             not null,
    used_at DATE null,
    guessed boolean default 'f' not null
)
down.sql should destroy anything that has been created before, thus in here
the tables should be dropped.
drop table dictionary;
Open diesel.toml and change the file property of print_schema to match
src/db/schema.rs. This file will be generated in the next step and I like to
keep things tidy. Also don’t forget to create a new folder named db in the
src folder.
# For documentation on how to configure this file,
# see diesel.rs/guides/configuring-diesel-cli

[print_schema]
file = "src/db/schema.rs"
After that, run the migration with diesel migration run.

There should be a new dictionary table in our postgres instance.
When running migrations, diesel generates the schema.rs file. Locate it in the
path we set before.
table! {
    dictionary (id) {
        id -> Int4,
        word -> Varchar,
        used_at -> Nullable<Date>,
        guessed -> Bool,
    }
}
The table! macro generates a lot of code that ensures mapping between the
types we use in Rust and those of the underlying DBMS, in our case postgres. You
can find an in-depth description in the
diesel guide.
That’s it, the database is set up! Additionally, you can import the database URL into a SQL tool of your choice to make browsing easier.
Fun with diesel ORM
Before we start coding, consider a few things. Until now only TextDictionary
gets created. We defined shared behavior for an additional Dictionary. diesel
requires an additional internal model for the application that the query results
get mapped into. After that, the Rust binaries themselves should be able to
choose between creating a TextDictionary and a DbDictionary.
Start with the module. That means, we’ll create a new module in the already
existing db folder. Add new files: mod.rs, db_dictionary.rs and model.rs
on top of schema.rs to match the new project structure.
fancy-hangman
|- Cargo.toml
|- diesel.toml
|- bin
  |- src
    |- import.rs
|- res
  |- db
    |- dictionary.db
  |- dictionary_en.txt
  |- source_file.txt
|- src
  |- db
    |- db_dictionary.rs
    |- mod.rs
    |- model.rs
    |- schema.rs
  |- lib.rs
  |- main.rs
  |- dictionary.rs
  |- text
    |- mod.rs
    |- text_dictionary.rs
|- tests
  |- text_dictionary_test.rs
Add the module declarations in the newly created mod.rs first.
mod model;
mod schema;
pub mod db_dictionary;
DbDictionary should handle database connectivity internally, just like
TextDictionary does with its dictionary_file_path. The same applies to the
model and the schema. There is no need for other modules to have access, the
only publicly accessible module should be db_dictionary.
Before we do that, open lib.rs and add the following lines.
pub mod db;

#[macro_use]
extern crate diesel;
Without macro_use, the code wouldn’t compile. Although since the 2018 version,
macro_use is discouraged, but some crates still ship with this requirement. It
allows us to access diesel macros across all applications, for example the
table! macro in the generated schema.rs.
Now, open model.rs.
use chrono::NaiveDate;

use super::schema::dictionary;

#[derive(Queryable)]
pub struct DbDictionaryEntry {
    pub id: i32,
    pub word: String,
    pub used_at: Option<NaiveDate>,
    pub guessed: bool,
    pub language: String
}

#[derive(Insertable)]
#[table_name="dictionary"]
pub struct NewDbDictionaryEntry {
    pub word: String,
    pub language: String
}
We need two model definitions. The first one, DbDictionaryEntry, is a full
representation of one row in the table dictionary we created when setting up
the database. The Nullable column used_at translates into an Option .
language is part of the localization. Theoretically, a more clean way would be
defining separate tables for each language, but that’s a hard thing to do with
an ORM as the schema would not be known at compile time.
The second one, NewDbDictionaryEntry only exists for inserting a new row. In
the create table statement it is shown that the id is an auto incrementing
primary key and used_at and guessed both have default values set. It’s not
possible to use both derivations
Queryable and
Insertable on the
same struct because, when creating an instance, the field all need to be set and
thus id would be overwritten, resulting in a possible duplicate key violating
a unique constraint. You can’t have two data sets with the same primary key, and
you shouldn’t keep track of primary key uniqueness across the application. That
job belongs to the DBMS.
By defining a second model, the DBMS handles everything except the word and
language columns that come from the application. But now, open
db_dictionary.rs.
Fun with diesel’s query builder
Thanks to the fact that complex data structures are easier to handle with
databases than they are with plain text files, we have more possibilities to
create an enhanced user experience. I sneakingly introduced a few new attributes
for the DbDictionary you haven’t seen in the TextDictionary implementation.
The latter randomly selected a word from the text file, so there’s a chance it
could occur a second time. Where’s the fun in that? DbDictionary won’t work
that way. Similarly to the original game, there’s only one word a day to be
guessed. We can achieve this by updating the row that was randomly selected and
setting today’s date in the used_at column. That row will represent the word
of the day.
This way, if the player fails to guess the word, he won’t have any more attempts
left. If he guessed correctly, the guessed flag will be set to true, and he
receives our dearest congratulations when starting the game again. Start
implementing DbDictionary like shown below.
pub struct DbDictionary {
    conn: SqliteConnection,
    app_language: AppLanguage
}

impl DbDictionary {
    pub fn new(db_url: String, app_language: AppLanguage) -> DbDictionary {
        DbDictionary {
            conn: SqliteConnection::establish(&db_url)
                .expect(&format!("Error connecting to database {}", db_url)),
            app_language
        }
    }

    fn update_entry(&self, entry: &DbDictionaryEntry) {
        // ...
    }

    fn get_word_of_today(
        &self,
        current_day: NaiveDate
    ) -> Result<Option<DbDictionaryEntry>, Error> {
        Ok(None)
    }
}

impl Dictionary for DbDictionary {
    /// Return a randomly selected word that has not been used before.
    /// If found, the database entry will be updated with
    /// a [chrono::NaiveDate] matching today's date.
    fn get_random_word(&self) -> Option<DictionaryEntry> {
        None
    }

    fn find_word(&self, text: &str) -> Option<DictionaryEntry> {
        None
    }

    fn create_word(&self, word_entry: DictionaryEntry) {
        // ...
    }
}
Because code tends to become messy when using a query builder, I added two
methods to DbDictionary that help us achieve the new requirements.
update_entry should do as the name says, update an existing row.
fn update_entry(&self, entry: &DbDictionaryEntry) {
    match diesel::update(dictionary::dsl::dictionary
        .filter(dictionary::id.eq(entry.id)))
        .set((dictionary::used_at.eq(entry.used_at),
            dictionary::guessed.eq_all(entry.guessed)))
        .execute(&self.conn) {
            Ok(affected_rows) => if affected_rows <= 0 { println!("No rows were affected when updating {}", entry.id) },
            Err(error) => println!("Error when updating entry with id {}:\n{}", entry.id, error)
    }
}
This will help with the first part of the “word of the day” feature and when the player successfully guessed the word.
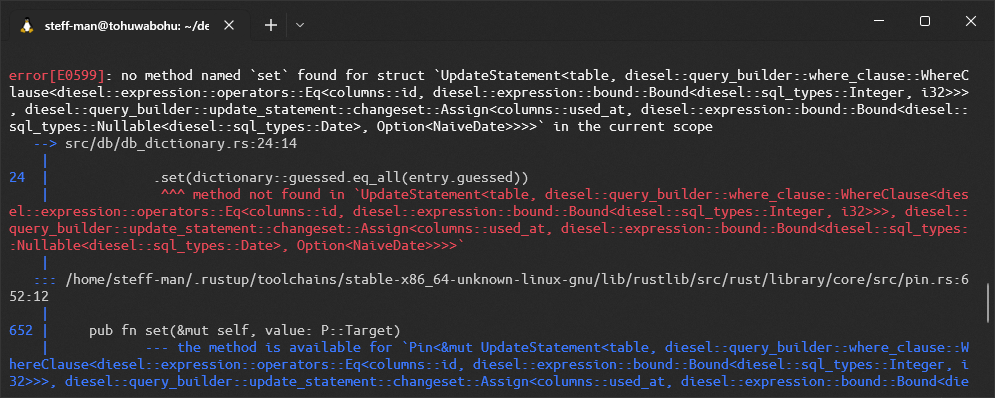
It’s nothing special, just match the id and set used_at and guessed
accordingly. set can process
Tuples to
update more than one column. execute returns a
diesel::result::QueryResult
that we can process in a match construct, we should do that to get useful
error messages. Compared to a plain text file that we use standard libraries
for, database connections handled by an external crate provide more error
potential.
fn get_word_of_today(
    &self,
    current_day: NaiveDate
) -> Result<Option<DbDictionaryEntry>, Error> {
    match dictionary::dsl::dictionary
        .filter(dictionary::used_at.eq(current_day))
        .filter(dictionary::guessed.eq(false))
        .filter(dictionary::language.eq(&self.app_language.to_string()))
        .limit(1)
        .get_result::<DbDictionaryEntry>(&self.conn)
        .optional() {
            Err(error) => Err(error),
            Ok(result) => match result {
                Some(entry) => Ok(Some(entry)),
                None => dictionary::dsl::dictionary
                    .filter(dictionary::used_at.is_null())
                    .filter(dictionary::language
                        .eq(&self.app_language.to_string()))
                    .order(sql::<()>("RANDOM()"))
                    .limit(1)
                    .get_result::<DbDictionaryEntry>(&self.conn)
                    .optional()
        }
    }
}
This wonky-looking construct consecutively executes two queries to fetch today’s
word. The first part looks for any entries that have the current day set as
used_at. If Some exists, it’s being returned as Option. If None exists,
then the second query is executed that randomly selects a row where used_at is
null. Those statements translate to the SQL below.
select *
from dictionary
where used_at = ?
  and guessed = false
  and language = ?;
That’s straightforward. Return not guessed entries where the language equals the application settings’ language that have been used at a specific date. This query should always be executed with today’s date.
select *
from dictionary
where used_at is null
  and guessed = false
  and language = ?
order by random() limit 1;
This one might need some more explanation. Get all entries where used_at and
guessed are not set. language should match as well, then order them randomly
with the random
function and finally limit the result to one. The first statement doesn’t need
limitation as the maximum row count of one is implicit unless somebody tinkers
with the data.
Now it’s time to start implementing Dictionary for DbDictionary.
/// Return a randomly selected word that has not been used before.
/// If found, the database entry will be updated with
/// a [chrono::NaiveDate] matching today's date.
fn get_random_word(&self) -> Option<DictionaryEntry> {
    let current_day = chrono::Utc::now();
    let current_day: NaiveDate = current_day.naive_utc().date();

    match self.get_word_of_today(current_day) {
        Ok(result) => match result {
            None => None,
            Some(mut entry) => {
                entry.used_at = Some(current_day);

                self.update_entry(&entry);
                Some(DictionaryEntry{ word: entry.word })
            }
        }
        Err(error) => {
            println!("Error when getting today's word.\n{}", error);
            None
        }
    }
}
get_random_word now fetches an unused entry and marks it with the current date
right afterwards. Therefore, this method will only return the marked word when
called a second time.
fn find_word(&self, text: &str) -> Option<DictionaryEntry> {
    let db_result = dictionary::dsl::dictionary
        .filter(dictionary::word.eq(text))
        .filter(dictionary::language.eq(&self.app_language.to_string()))
        .get_result::<DbDictionaryEntry>(&self.conn)
        .optional();

    match db_result {
        Ok(db_word) => match db_word {
            Some(entry) => Some(DictionaryEntry { word: entry.word }),
            None => None
        },
        Err(error) => {
            println!("Error when looking for '{}' in the database:\n{}",
                text, error);

            None
        }
    }
}
find_word looks for an entry with matching word and language.
fn create_word(&self, word_entry: DictionaryEntry) {
    match self.find_word(&word_entry.word) {
        None => {
            let new_word = NewDbDictionaryEntry {
                word: word_entry.word,
                language: self.app_language.to_string()
            };

            let db_result = diesel::insert_into(dictionary::table)
                .values(&new_word)
                .execute(&self.conn);

            match db_result {
                Ok(_) => println!("Added '{}' to the database!", &new_word.word),
                Err(e) => println!("Error when writing '{}' to the database:\n{}", &new_word.word, e)
            };
        },
        Some (_) => {}
    };
}
Like in TextDictionary, create_word implicitly calls find_word to avoid
duplicates. After that, an INSERT is being performed.
The fuzz about dyn and Box<?>
When having multiple implementations of a trait, and you want a function to
return said trait, the compiler does not know how much memory to allocate.
That means, in our case, that if you thought about creating a function
get_dictionary() -> Dictionary that returns either a TextDictionary or a
DbDictionary based on various circumstances just like you do in other
languages – e.g. Java – you can quickly put this thought aside. The Rust
documentation mentions how to proceed in
Returning Traits with dyn.
I recommend reading about
stack and heap
to understand what happens here. To summarize, the implementation won’t be
statically allocated, but dynamically allocated on the heap. Instead of
returning Dictionary, the Rust compiler requires us to return a reference that
points to the heap. The reference has a static size that is known during
compile-time.
We do so by putting the implementation of Dictionary into a
std::boxed::Box. But
that’s not enough, the compiler doesn’t know which implementation will be
returned during runtime. Therefore, the
dyn keyword exists. Thankfully
the implementation is fairly simple and doesn’t differ that much from the
original idea.
pub fn get_dictionary(
    app_language: AppLanguage,
    dictionary_flag: String
) -> Box<dyn Dictionary> {
   // ...
}
Switching dictionaries
As for the decision on how to determine the Dictionary implementation, I
thought about a flag that can assume either "text" or "db" with the
TextDictionary as backup. Because the DbDictionary must have a URL, the
function is allowed to `panic! when the URL is missing. It could like this:
pub fn get_dictionary(
    app_language: AppLanguage,
    dictionary_flag: String
) -> Box<dyn Dictionary> {
    match dictionary_flag.as_str() {
        "db" =>  {
            dotenv().ok();
            Box::new(DbDictionary::new(
                env::var("DATABASE_URL").expect("DATABASE_URL must be set"),
                app_language
            ))
        },
        _ => Box::new(TextDictionary::new(format!("res/dictionary_{}.txt", app_language.to_string()))),
    }
}
Thanks to the dotenv Rust community crate, we
can read the DATABASE_URL property in a fairly simple way from the .env
file. The expect function panics when the property does not exist and prints
the error message we set.
The flag should be received as CLI argument. Open main.rs and add a language
argument like we did in
Building a CLI wordle game in Rust: Part 4
for import.rs and add an optional dictionary argument.
/// Play wordle, a word guessing game!
#[derive(Parser)]
struct Arguments {
    language: Option<String>,
    dictionary: Option<String>
}

fn main() -> {
   let dictionary = TextDictionary::new(String::from("res/dictionary.txt"));
   // ...
}
We also skipped the localization part here, that’s about to change as well.
Remove the marked line and start evaluating the passed arguments. Remember to
use TextDictionary as fallback.
fn main() -> {
    let args = Arguments::parse();

    let app_language = match args.language {
        None => get_app_language(),
        Some(flag) => parse_app_language(flag.as_str())
    };

    let dictionary: Box<dyn Dictionary> = match args.dictionary {
        None => get_dictionary(app_language, String::from("text")),
        Some(flag) => get_dictionary(app_language, flag)
    };

    // ...
}
Apply those changes to import.rs. Currently, the TextDictionary gets created
in the import function. Remove that line and add a parameter
dictionary: Box<dyn Dictionary> instead.
/// A maintenance tool for wordle
#[derive(Parser)]
struct Arguments {
    source_file: String,
    language: Option<String>,
    dictionary: Option<String>
}

fn main() -> std::io::Result<()> {
    // ...
    let dictionary: Box<dyn Dictionary> = match args.dictionary {
        None => get_dictionary(app_language, String::from("text")),
        Some(flag) => get_dictionary(app_language, flag)
    };
    // ...
}

// ...

fn import(
    tmp_file_name: String,
    dictionary: Box<dyn Dictionary>
) -> Result<i32, Error> {
    // ...
}
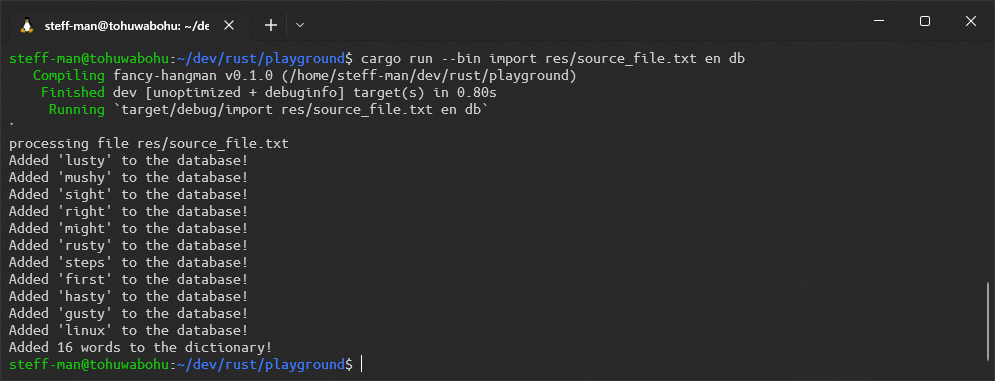
We are as good as finished. Now, try importing with
cargo run --bin import source_file.txt en db.
Rolling back
Before we look into the database, it’s time to fix some unwanted behavior.
Obviously the words counted are wrong. Because create_word in Dictionary
does not have a return value, the import function has no condition for
incrementing its counter. Mistakes happen, but this can easily be fixed. Rewrite
the create_word function to return either an Option<DictionaryEntry> or a
Result<Option<Dictionary>, Error>, I’ll leave it up to you. Just indicate what
happened.
Because we change how the trait behaves, the integration test should be changed
as well. So, open text_dictionary_test.rs and adapt the test_create_word
test. Run cargo test afterwards.
#[test]
fn test_create_word() {
    let file_path = setup();

    let dictionary = TextDictionary::new(file_path.clone());

    match dictionary.create_word(DictionaryEntry{ word: String::from("rusty") }) {
        None => assert!(false),
        Some(_) => assert!(true)
    }

    match dictionary.create_word(DictionaryEntry{ word: String::from("testy") }) {
        None => assert!(false),
        Some(_) => assert!(true)
    }

    match dictionary.create_word(DictionaryEntry{ word: String::from("rusty") }) {
        None => assert!(true),
        Some(_) => assert!(false)
    }

    teardown(file_path);
}
After you’re finished, call diesel migration redo. In order to test, we need a
fresh start with an empty database. The loop for in the import function should
look like this.
for line_result in buf_reader.lines() {
    let line = line_result.unwrap();

    match dictionary.create_word(DictionaryEntry { word: line.to_lowercase() }) {
        None => {},
        Some(_) => {
            counter += 1;
        }
    }
}
Let’s import again.
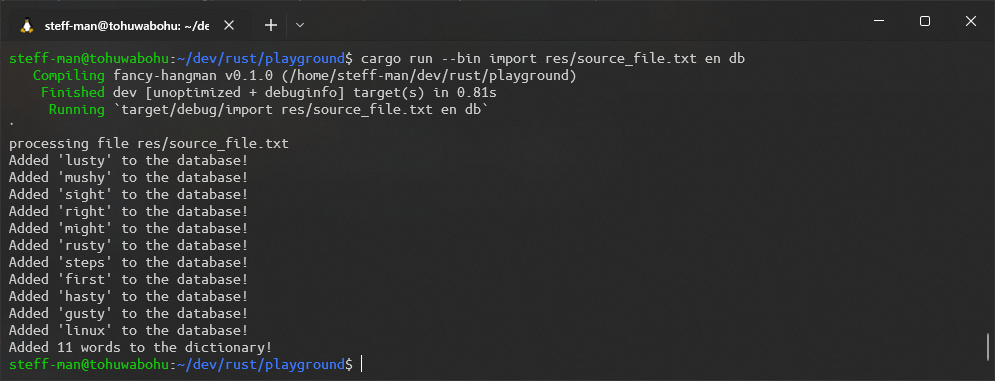
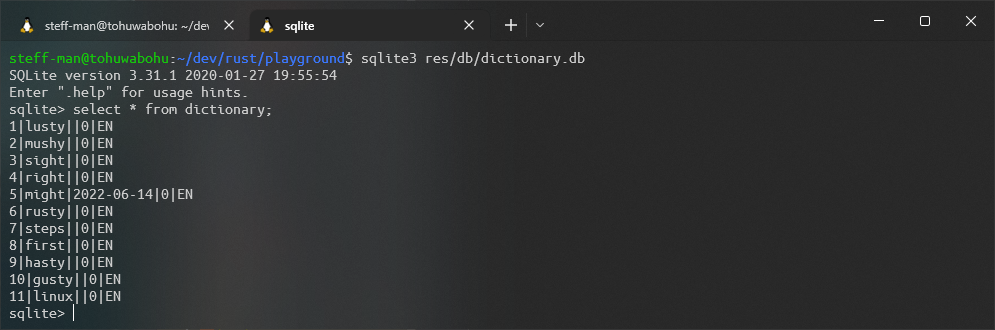
There should be 11 rows in the database’s dictionary table. Run
sqlite3 res/db/dictionary.db and execute select * from dictionary; after you
connected.
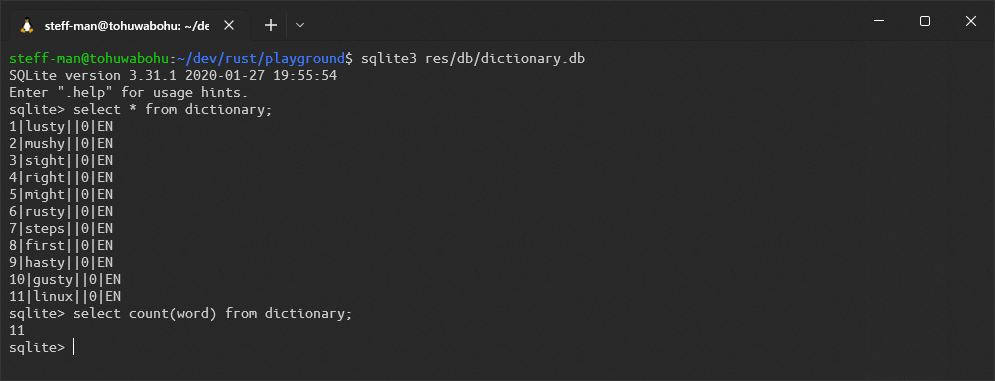
Seems like sqlite does not render the table header. The column names shown are:
id, word, used_at, guessed, language. The null representation is
just an empty column.
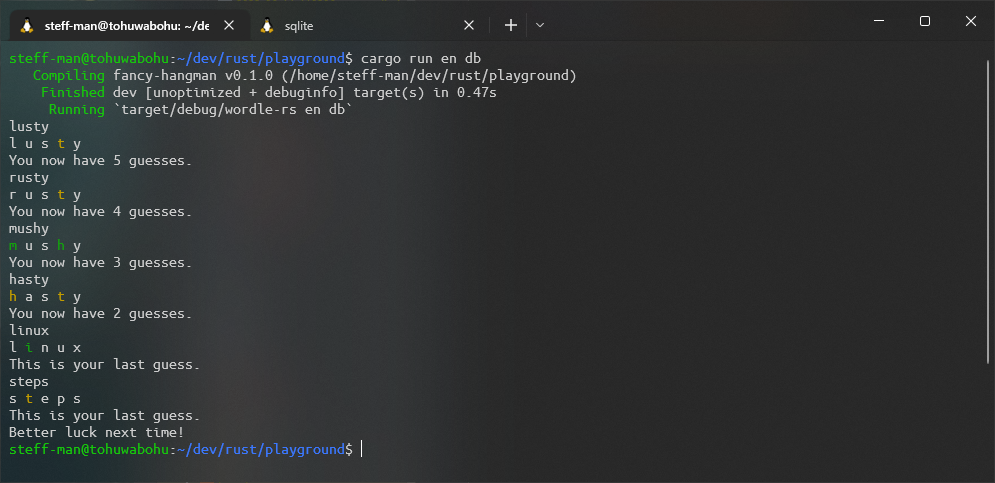
This is the initial status of the dictionary. When you start the game, one of
those entries will get selected randomly with a used_at value set. Run
cargo run en db and look into the sqlite DB right after.
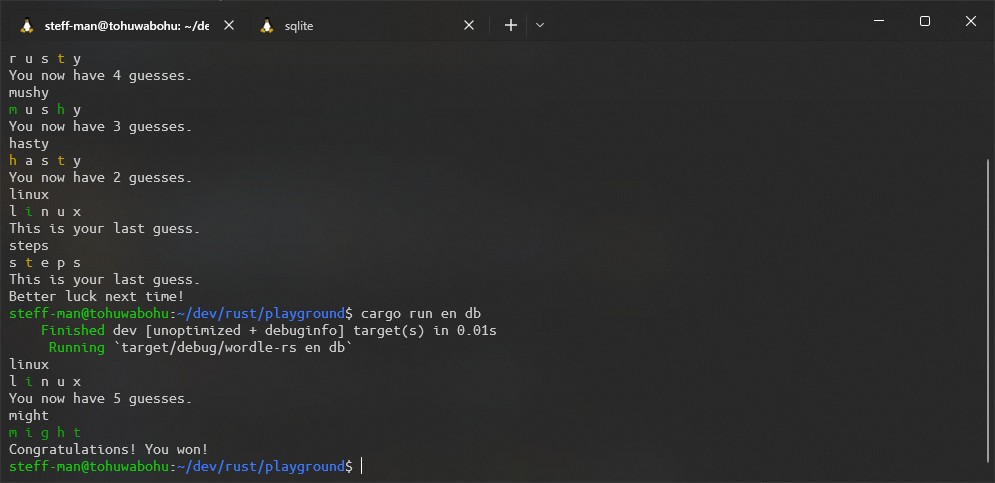
When you lose on purpose now, there shouldn’t be any difference in the result of the select statement when starting the game another time.
Start it a second time and check the database. There’s a chance we know the solution this time.
Wrapping it up
Here part 5 of this Rust tutorial comes to an end. When choosing your tools, think wisely. What features does it provide? Do I need them all? Might there be better alternatives? That’s what we did here when choosing the DBMS. Sqlite is easy to set up, portable, and can be shipped within the application. Postgres on the other hand would have a dedicated boolean type, supports concurrency, replication, … and would be the better choice if we planned developing a scalable web application. A simple CLI application couldn’t be further from that. But at last we can enjoy the new features we implemented for the player.
However, there are still a few things missing. In the next and final part of this Rust tutorial we will complete the game logic, improve argument option information, display a greeting message on game startup and add pretty progress bars to the import tool.
You can find the code at this stage on my github page.
Building a CLI wordle game in Rust: Part 4