Building a CLI wordle game in Rust: Part 3
In the previous part of this Rust tutorial we improved our game’s dictionary by choosing a solution from an external text file and reworked how the attempts are counted. For this we needed to become familiar with structs, traits and how to read from a local file. However, it is still necessary to manually adapt the dictionary. It would be much easier to have a tool that handles dictionary extension. Also, what if we want to add another type of dictionary, let’s say a database?
To ensure that the foundation we build on is stable, unit tests and integration testing come to mind before adding those new features. Also, there’s still the problem with user input possibly containing special characters.
Table of Contents
- Prerequisites
- Getting started
- Refactoring
- Introducing modules
- String sanitization
- Localization
- Unit Testing
- Converting to ASCII
- Wrapping it up
Prerequisites
The previous part Building a CLI wordle game in Rust: Part 2 should be completed before you start.
Add two new crates to Cargo.toml, like shown below.
[package]
name = "fancy-hangman"
version = "0.1.0"
edition = "2021"

# See more keys and their definitions at
# https://doc.rust-lang.org/cargo/reference/manifest.html

[dependencies]
colored = "2"
rand = "0.8.5"
any_ascii = "0.3.1"
sys-locale = "0.2.0"
any_ascii provides a conversion from unicode to ASCII characters and with sys-locale we can get the language settings of the operating system. More of that later.
Run cargo build and open main.rs.
Getting started
Over the next few minutes, we will
- Refactor the existing project into modules
- Scratch the topic of character encoding
- Write our first unit tests
Refactoring
Right now the whole code base resides in the main.rs file. After loudly
thinking about new additional features, this is the perfect time to split the
code into separate packages for better overview. In Rust, you split the code
into modules. A module is a collection of structs, traits, functions and
possibly other modules.
Currently, the project is structured like this:
fancy-hangman
|- Cargo.toml
|- res
  |- dictionary.txt
|- src
  |- main.rs
When refactoring, the core features of the program should be identified first.
Here, it’s not the main function, but rather the game logic and the dictionary
data structure. As TextDictionary is an implementation of the Dictionary
trait, that could possibly be implemented otherwise, those should split
hierarchically with Dictionary sitting somewhat on the root of the project and
TextDictionary sitting in an own module.
So, create a new file dictionary.rs on the same level as main.rs. Move both
the trait Dictionary and the struct Dictionary into the file.
/// Provides basic functions for reading and writing from and to a dictionary
pub trait Dictionary {
    fn get_random_word(&self) -> Option<DictionaryEntry>;
    fn find_word(&self, text: &str) -> Option<DictionaryEntry>;
}

/// Represents a dictionary entry
pub struct DictionaryEntry {
    pub(crate) word: String
}
Create a folder named text on the same level. In this folder, we need two new
files: mod.rs and text_dictionary.rs . Move the struct `TextDictionary and
both implementations into the latter.
/// Provides a dictionary represented by a text file
pub struct TextDictionary {
    pub dictionary_file_path: String
}

impl TextDictionary {
    // ...
}

impl Dictionary for TextDictionary {
    // ...
}
The new structure should match this one here:
fancy-hangman
|- Cargo.toml
|- res
  |- dictionary.txt
|- src
  |- dictionary.rs
  |- main.rs
  |- text
    |- mod.rs
    |- text_dictionary.rs
Introducing modules
We’re not finished yet. In order for the compiler to find the modules, they need
to be declared first. You do this by using the mod keyword. This part can be
confusing, because you don’t add it into the files containing the moved code –
dictionary.rs and text_dictionary.rs – as expected, but in the main.rs
file and the mod.rs file in the text folder.
To understand what we’re doing when splitting everything up, I suggest reading
the Rust documentation on
file hierarchy in context of modules.
In short, when putting modules into folders, each folder should also contain a
mod.rs file that primarily contains the module declaration.
In text/mod.rs, add:
pub mod text_dictionary;
And in main.rs, add the following lines to the top:
use crate::dictionary::Dictionary;
use crate::text::text_dictionary::TextDictionary;

mod dictionary;
mod text;
After that, in text/text_dictionary.rs the compiler can’t find the
Dictionary trait and the DictionaryEntry struct anymore. So import them:
use crate::dictionary::{Dictionary, DictionaryEntry};
Now, remove any unnecessary imports in main.rs and run cargo build. The
compiler will tell you what imports you forgot. Repeat until no warnings are
left.
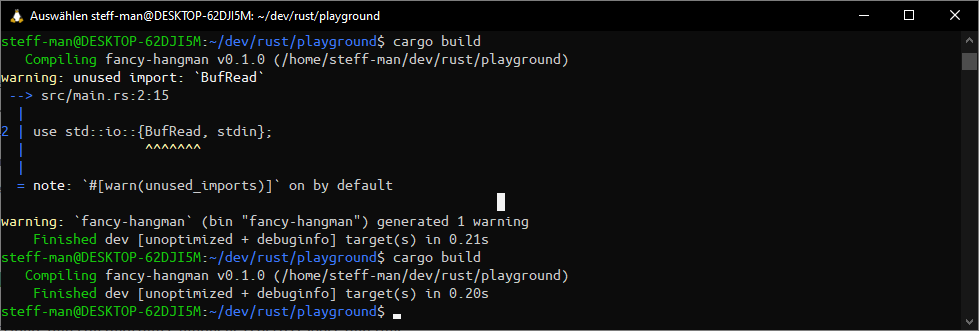
Give it a test with cargo run. Everything should still work as expected!
String sanitization
If you remember Building a CLI wordle game in Rust: Part 1, the user input validation consists of a simple size check. Only Strings with a length of 5 characters are permitted. But, what if the user inserts a special character, like a German Umlaut? That interferes with the length check.
When counting the letters in the german word “schön”, studies conclude that it consists of 5 letters. But when the computer reads it as UTF-8 encoded String, it will count 6 letters. The same happens with “böse”: It should be 4 characters long but the program tells us that it obviously passed the length check that requires 5 characters. That’s because special characters like the Umlaut are double the size.
The possibilities to appropriately handle such cases are endless. But, if we keep the game rules in mind, we realize that only words that contain alphabetic characters from A-Z should be guessed. Thus, the input should only contain characters from A-Z and their lowercase forms a-z.
Also, we should consider that we maybe want to localize the game in the future, allowing words in other languages to be guessed or even have the whole user interface translated. For now, we can choose between blocking any input that does not match an ASCII character with a simple regular expression or a unicode to ASCII conversion.
The regex could look like this:
/^[A-Z]+$/i
/^[A-Za-z]+$/
Personally, I think that would be a very boring solution and not the best player experience. Usually those special characters – for example, letters of the Greek alphabet – can be translated into a matching ASCII char. It would be much more convenient for the user to have his input processed automatically instead of an error message he possibly wouldn’t understand.
And this is where the any_ascii and the sys-local crate both come into play. Those Rust community crates enables us to assume the language of the dictionary that is loaded, the former provides mentioned unicode to ASCII translation, exactly what we need.
Localization
Create a lang module in the folder structure and add a new file named
locale.rs. It should look like the structure below. Afterwards, open
locale.rs.
fancy-hangman
|- Cargo.toml
|- res
  |- dictionary.txt
|- src
  |- dictionary.rs
  |- lang
    |- locale.rs
    |- mod.rs
  |- main.rs
  |- text
    |- mod.rs
    |- text_dictionary.rs
Think of any language you want to support apart from English. As a native
speaker, I chose German. Because the value of a locale representation can have
many dialects for the same language – e.g. en-US, en-UK, de-DE, de-AT
and so on – define an
enum to parse
the value. Those granulated distinctions serve no purpose for this program.
#[derive(Clone, Copy, Debug, PartialEq)]
pub enum AppLanguage {
    DE,
    EN
}
Maybe you noticed the
derive keyword. I
won’t go into detail explaining what it does, but you should know that it
provides a set of default implementations for different purposes. In our case
the chosen attributes make it easier to propagate instances of AppLanguage
through the code.
PartialEq for example
enables us to call the eq function with an `AppLanguage.
Speaking of which, add two functions get_app_language and
parse_app_language(&str), that each return an AppLanguage value. English is
the game’s default language, so when reading the locale does not return anything
useful, AppLanguage::EN should be returned as fallback.
use sys_locale::get_locale;

// ...

pub fn get_app_language() -> AppLanguage {
    match get_locale() {
        Some(locale) => parse_app_language(locale.as_str()),
        None => AppLanguage::EN
    }
}

fn parse_app_language(locale_str: &str) -> AppLanguage {
    match locale_str {
        "de" => AppLanguage::DE,
        "de-DE" => AppLanguage::DE,
        "de-AT" => AppLanguage::DE,
        _ => AppLanguage::EN
    }
}
Yes, we could totally make this happen in a single function, but `parse_app_language will be our first function that we implement a unit test for.
Unit Testing
Often ignored, unit testing is one of the pillars in development. The smallest testable components of your code should be covered by unit tests. Unexpected behavior and errors can be detected and fixed before the release, meaning less time needed for maintenance afterwards.
Writing useful tests is an art on its own. Like coding, your capabilities only get better if you keep doing it. Reflect what test case could be useful and don’t forget about negative test cases when you’d expect a component to fail. In Rust, they are many places unit tests can be put into. Personally I prefer to keep the tests neatly inside my modules and put them to the end.
#[cfg(test)]
#[test]
fn test_parse_app_language() {
    assert_eq!(parse_app_language("de"), AppLanguage::DE);
    assert_eq!(parse_app_language("de-AT"), AppLanguage::DE);
    assert_eq!(parse_app_language("de-DE"), AppLanguage::DE);
    assert_eq!(parse_app_language("en"), AppLanguage::EN);
    assert_eq!(parse_app_language("it"), AppLanguage::EN);
    assert_eq!(parse_app_language(""), AppLanguage::EN);

    assert_ne!(parse_app_language("de-DE"), AppLanguage::EN);
    assert_ne!(parse_app_language("it"), AppLanguage::DE);
    assert_ne!(parse_app_language(""), AppLanguage::DE);
}
Like mentioned before, I’d expect this test to fail when "de-DE" does not
return the default value AppLanguage::EN. Also, "it" is currently
unsupported and should deliver the fallback value. We’ll keep implementing unit
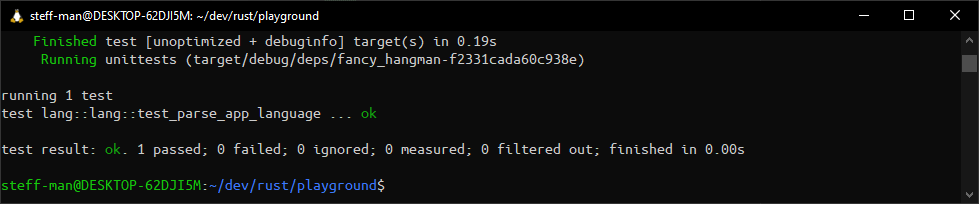
tests from now on.
Run cargo test. You should get output similar to the one below.
Converting to ASCII
Because regular expressions are boring, I’ve decided to just replace any invalid input with ASCII characters with help of the any_ascii crate. But there’s a catch: When converting the German Umlauts – ä, ö, ü – they get replaced by a, o and u. This is unwanted behavior. Because of historical circumstances, the correct replacement is as follows: ae, oe and ue.
It’s not expected for libraries that convert possibly any language to implement an edge case for those 3 letters – if you take uppercase letters into account, they’re 6 – because of a single use case. The Finnish language, for example, also has Umlauts, and it’s acceptible to just drop the dots. In German, it’s not so we need to do that replacement part by ourselves. It does not need to be the prettiest solution.
use any_ascii::any_ascii;

// ...

/// Eliminate non-ASCII characters.
/// Replace common german special characters with their matching counterparts.
/// The parameter is expected to be lower case.
pub fn replace_unicode(word: &str, app_language: AppLanguage) -> String {
    match app_language {
        AppLanguage::DE => {
            // replace umlauts for german language
            let without_umlauts = replace_umlauts(word);

            any_ascii(without_umlauts.as_str())
        }
        _ => any_ascii(word)
    }
}

/// Replace german umlaut characters with their logical counterparts.
/// The parameter is expected to be lowercase.
///
/// * 'ä' -> "ae"
/// * 'ö' -> "oe"
/// * 'ü' -> "ue"
fn replace_umlauts(word: &str) -> String {
    word.replace("ä", "ae").replace("ö", "oe").replace("ü", "ue")
}
So, replace_unicode invokes the replace_umlaut function before calling
any_ascii to ensure nothing gets lost. When supporting other languages, the
replace_unicode function can be extended with additional match arms. Cover
this new functions with unit tests.
#[cfg(test)]
#[test]
fn test_replace_umlauts() {
    assert_eq!(replace_umlauts("schön"), "schoen");
    assert_eq!(replace_umlauts("zäh"), "zaeh");
    assert_eq!(replace_umlauts("lüge"), "luege");

    assert_ne!(replace_umlauts("schön"), "schon");
    assert_ne!(replace_umlauts("zäh"), "zah");
    assert_ne!(replace_umlauts("lüge"), "luge");
}

#[test]
fn test_replace_unicode() {
    assert_eq!(replace_unicode("schön", AppLanguage::DE), "schoen");
    assert_eq!(replace_unicode("geschoß", AppLanguage::DE), "geschoss");
    assert_eq!(replace_unicode("zäh", AppLanguage::DE), "zaeh");
    assert_eq!(replace_unicode("lüge", AppLanguage::DE), "luege");

    assert_eq!(replace_unicode("schön", AppLanguage::EN), "schon");
    assert_eq!(replace_unicode("geschoß", AppLanguage::EN), "geschoss");
    assert_eq!(replace_unicode("zäh", AppLanguage::EN), "zah");
    assert_eq!(replace_unicode("lüge", AppLanguage::EN), "luge");
}
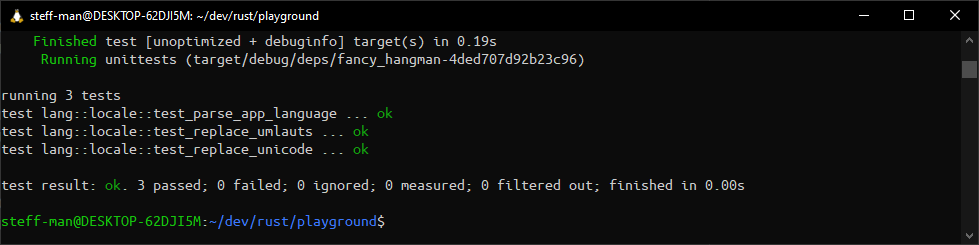
I’d expect the conversion to not replace Umlauts when English is set as
language. replace_umlauts is unaffected by the locale setting and should
always to its job. Run cargo test.
Now you may ask, why not also test get_app_language? The answer is simple, we
can’t ensure the system settings the test is executed on. Just because the
locale on your local machine is known doesn’t mean that it’s the same on the
build server. Or maybe someone else checks out the project into his workspace,
with the locale set to French; the test fails.
But we can influence the conversion of the system setting into our application
setting. Because auf the fallback mechanism we ensure that even somebody from
France can run the test and at least use the English version. And that’s the
part we could and should test. We do so in test_parse_app_language.
However, there is a technique called localization testing that covers the application’s behavior as a whole for different language settings. This is out of scope for a unit testing and should be implemented after the whole application has been internationalized.
As the final step, make sure the conversion function is used in the game. Open
main.rs and adjust read_input.
use crate::lang::locale::{AppLanguage, get_app_language, replace_unicode};
mod lang;

// ...

fn read_input(word_len: usize) -> String {
    let mut input: String = String::new();

    loop {
        stdin().read_line(&mut input).unwrap();
        let polished = replace_unicode(input.trim(), get_app_language());

        if !validate_user_input(&polished, word_len) {
            println!(
                "Invalid input: Your guess must have a size of {} characters. You entered {} characters.",
                word_len, polished.len()
            );

            input.clear();
        } else {
            input = polished.to_lowercase();

            break;
        }
    }

    input
}
Instead of just trimming the user input, the whole polishing that we implemented
before will be executed. Also, add unit tests for read_input.
#[cfg(test)]
#[test]
fn test_validate_user_input() {
    assert!(validate_user_input(
        replace_unicode("schön", AppLanguage::DE).as_str(), 6
    ));

    assert!(validate_user_input(
        replace_unicode("schön", AppLanguage::EN).as_str(), 5
    ));

    assert!(validate_user_input(
        replace_unicode("lüge", AppLanguage::DE).as_str(), 5
    ));

    assert!(validate_user_input(
        replace_unicode("lüge", AppLanguage::EN).as_str(), 4
    ));

    assert!(validate_user_input(
        replace_unicode("howdy", AppLanguage::DE).as_str(), 5
    ));

    assert!(validate_user_input(
        replace_unicode("howdy", AppLanguage::EN).as_str(), 5
    ));
}
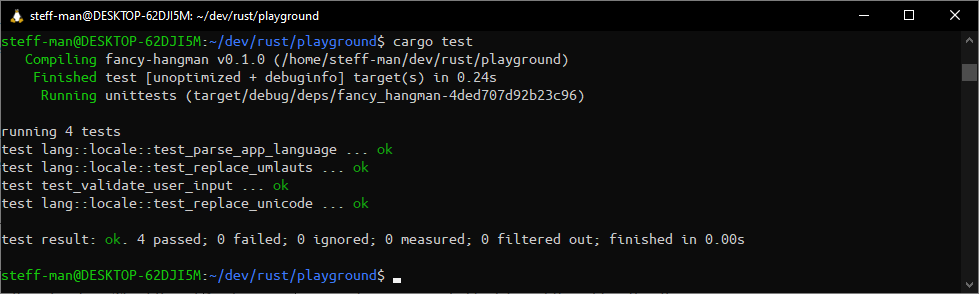
Those should be quite self-explanatory. The different AppLanguage enum values
are expected to deliver different lengths after conversion of Strings that
contain an Umlaut. Run cargo test.
Now, after all that hard work, finally try the changes yourself. Run
cargo run. I’ll test it with the same words I tried in the beginning.
Wrapping it up
Part 3 ends here. Some parts of development are more exciting than the others, but the not so exciting parts are far from being unuseful. I for myself have a lot of fun when refactoring stuff, even more if I manage not to break anything. Thanks to our work we now have a stable foundation that we can add new features on. The project parts are neatly put into modules with unit tests ensuring their integrity resulting in a more stable program that the player benefits from.
Manually maintaining the dictionary is exhausting. In the next part of this Rust tutorial we’ll write an importing tool that enables us to automatically extend it from a given word list and we will write our first integration test. Again, we’ll need to change some stuff for internationalization and peek into some more crates of the Rust community. I promise that the next part will include more action.
You can find the code at this stage on my github page.
Building a CLI wordle game in Rust: Part 2